This page is dedicated to building pickups for electric hammered dulcimers, and is part of my extensive home site, where you'll find lots of info on me, my music, and the electric and acoustic hammered dulcimers I have designed and built. There are pages on my recordings, travels, ARCHIVES of tour journals, background information, recent news, and lots more.
Everyone is welcome here, at any level of knowledge. I myself am a musician and learned everything I know as I went along, and would be the first to admit that I have a very incomplete knowledge of electronics, and pickups, and am still learning as I go along. I have a common weakness of the self-taught in that I never studied electronics in a systemic way, so often I don't even know what I don't know. I might be missing some simple basic concepts, so feel free to mention them to me if you know more than me, and I'll add the information to these pages. That said, I'll try to give a basic description of the types of pickups and how they work.
Luckily, there is a great body of knowledge around pickups for guitars to draw on written by people who know a lot more than I do about the subject if you wish to pursue it. At the bottom of the page I have provided links to some of the good sites I found.
If you are interested in winding your own coils, I have a complete description of the simple machine I built to wind my pickup coils,
though you could use it to wind coils for any instrument as well. I have tried to make this discription of everything I have done detailed enough so you can copy me if you wish, though I probably will end up making pickups for anyone who wants to buy a set from me as well. Just as I plan to build more electric dulcimers. But it isn't rocket science, so I hope these pages can help you do it yourself if you feel so inclined.Drop me a line and let me know how it goes, I can include the information here.
1. Forward
2. Past practice: What I have used
3. Pickup Development Plans and Progress Reports
2008
2009
4. Coil Pickups: The Test Results
5. Suppliers for Parts and Materials
I've created seperate pages to give detailed descriptions and results on specific coils
Pickup Experiments: The Step Coil
Coil Pickups: The first Working Pickups
When I designed and built my first electric hammered dulcimer in the late 1980's, I bought a simple piezo contact pickup that got me started. Due to the fact that the electric dulci I built had a unexpectedly fine acoustic sound, for many years I got by with just contact pickups and microphones. However, the concept of building an electric version of the dulcimer always included using modern coil pickups and other electronics that were developed for electric guitars. Generally, I wanted to try applying anything that had been developed for electric music, not just for guitars, but keyboards at well which the dulcimer has more in common with than the guitar, though my style has more incommon with the guitar. There's an entire world of midi and digital processing as well. The modern "electrical" musical world spans everything from traditional acoustic instruments to intruments that are mechanical interfaces to control analog or digital electronic sound generators, with many interchangable modules to contribute to their signal on its way to the amp or recording device. My intention was to bring the dulcimer into that world.
But we are talking about pickups. At one point I borrowed a set of hand-wound coil pickups owned by my brother, who played traditional hammered dulcimer with his band on the Ren-Fair circuit. Once, years ago, a man saw him playing, using a contact pickup, and asked if he be interested in trying wound coil pickups like modern electric guitars. The man had retired from a company making pickups commercially, I don't know who or where. He offered to build a set, for a couple hundred dollars. I can remember my brother talking about bringing his dulcimer to the man's basement and watching him hand-wind a set of two pickups. I had to return the pickups to my brother after a short while trying them out, but it cemented my commitment to complete the process of building an electric dulcimer by winding pickups for it.
Many years have passed since then. I was busy performing and travelling, it is my work and my life. Then, like many people, I ran into some emergencies and disasters that took up all my energy for a decade and more, so often enough it was a struggle just to keep performing, even just to survive. All of the projects surrounding the dulci and my music went on hold. Till now, when I am finally working past all these difficulties and getting back to long over-due progress.
I plan to use this page to report the progress and results of experiments designing and building wound pickups, piezo pickups and related electronics for the dulci. I'll be including pictures, and more important, sound clips, as I go through this process. I am hoping that the end result will be to enable you to build your own pickups, with a better idea of appropriate specifications than I have had. I also plan to produce electric dulcimers to sell and I want to have a standard set of options to include with them, both in the combination of types of pickups and possibly even the specifications of those types. I can also just sell pickups themselves, though as dulcimers often vary slightly according to the maker, it might require me to build them to order to match the dulcimer.
Before I go on to my work with coil pickups, some of you might benefit from knowing the practical setups I used performing without coil pickups for many, many years.
For many years I successfully used a combination a piezo pickup and a standard acoustic instrument mike (eg. shure sm57) for practical performance gear on stage. As a singer, I would also have a vocal mike (shure sm58), which would also pick up some of the dulcimer as well. In acoustic settings I might use just the piezo. In both cases the piezo was used to amplify and sustain the bass section, allowing the rest of the instrument to come across acoustically, alone or through the mike if I was using one. I would often demonstrate the "electric" nature of the instrument by turning off the amp and letting people here the bass strings become almost inaudible and the sustain and lower midrange drop off significantly. Depending on your dulcimer, you might want to use more than one piezo to balance the sound from the two sides of the instrument. Placement is very important to keep from emphasising any particular strings or section, that's why I placed mine as far as possible from the bridges, and on the lower right side since the higher tones came through better than the lower notes. On my solid body, I was able to a "C" clamp to clamp the piezo to the right side support of the dulcimer. The tightness of the clamp actually effects the tone of the piezo by compressing the silicon and felt around it, in effect, a tone control. You might have to use a couple screws and a crosspiece to clamp the piezo to a standard acoustic dulcimer. I used a piezo bedded in silicon, with additional layers of felt seperating it from both the dulci and the clamp (which also transmits vibration quite well) to ease the sharpness of the attack, the "strike" sound of the hammer hitting the string. I used a simple 9 volt battery 4 channel mike mixer, specifically, an MM-40 by SignalFlex, to mix mikes and pickup into my small amp for a simple solo setup. In later years I fed the piezo through a L.R. Baggs Para Acoustic DI box. A DI box takes an input from a 1/4" plug and outputs through an XLR plug (for stageshows) or a 1/4" plug (to connect to my mike mixer and amp for solo shows without sound board and PA). This one is a high quality instrument DI designed for acoustic instruments, with a 5 band EQ and adjustable midrange filter and notch filter to target and reduce a specific tone. This is very useful for getting rid of the occasional "wolftones" that often arise out of the harmonics of the dulcimer, where one string or note wants to stand out above the rest. I often found that I needed the amp as much or more for my voice, so It didn't tire and I did't have to strain to be heard, could focus on tone rather than volume. Similairly, as I played the dulcimer, the amp allowed me to focus on tone and style rather than volume. I found I could "amplify" the dulcimer by placing it on a resonator, like a table, with the front propped up to a good playing angle. A bigger table gave me better bass. Then I would use the amp just for my voice.
For example, I asked Pete, the sound engineer for the mainstage at the Tanana Valley (Alaska) State Fair, how he mixed me, using my standard stage set up of a piezo, an instrument mike below the dulci and a vocal mike for me.
piezo: Used for Bass and Sustain, 75 htz roll off, high signal strength and low fader/boost
dulcimer mike: 75 htz boundry, mostly just highs, high to midrange on fader/boost
vocal mike: dry, boost highs (1 o'clock) and midrange
"I tune the sound to keep visible harmonic waves"
Generally, I plan to experiment with the design of the pickups themselves, and then their placement on the instrument. The theory is to keep adding and subtracting pickups till I get the the greatest range of control over tone and tone itself, while getting down to as simple a set up as possible. I expect to come up with a variety of options, each one balancing simplicity and variety, and people can chose what suits them, like with electric guitars. I have some small microphone elements to experiment with, though I don't plan to build any microphonic pickups, I might, who knows?
First, I am a musician, not an electrical engineer, so I had to study just to understand how coils worked. The first question was whether I had to adjust guitar pickup specs somehow in order not to have some sort of problems when winding coils 18 inches long instead of three inches. An 18 inch coil with 6000 turns has over 3 miles of wire in it. Will this matter? well, I still don't know. Unfortunately, I have never really gotten a clear answer to that question, but I don't plan a career as an electrical engineer. Still, I have gotten some concepts I might use to explain my results. Eventually, I realized I had to stop thinking about it and move forward. The wire is not so expensive that if I wasted some in the process of experimental error it was worth it to move forward. So I decided to start winding the first coils. It is difficult to know where to start and what to do for sure till you know what you want to end up with. The main reason behind building the Simple Pickup Winding Machine was so I could wind a lot of coils fairly easily, so I don't have to justify all the effort it would take if I hand wound each coil to experiment with. Till I know what I am going to end up with, or how the process will work, I can only continue with the glory of experimental error, even if it costs a whole spool of wire making coils I can't use. It will be worth it to end up with a design and a process for building coils, just as I had to build several prototypes on my way to building my electric dulcimer.
So I plan to experiment with most every aspect of coils I can, which is primarily with the number of winds, the placement and type of magnets, and the housing and placement of the pickups themselves. The end result, like with guitar pickups, won't be a specific design, but a working range of options and parameters for specific designs. In fact, the final conceptual design for the dulcimer is to have as many pickups, with switching, tone and volume controls, as I need to give me the widest selection of possible tones, but no more than is nescessary for that end. Just like guitars, though there are choices, designs have settled into a relative stability over time.
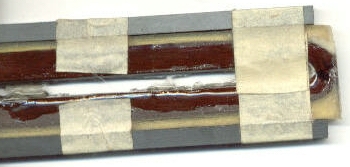
 I had to start with a few basic concepts. I was also evolving the entire process as I would every coil in the first sets of prototypes. "Potting" refers to saturating the finished coil with something, usually wax, so that the individual wires cannot vibrate in response to any physical inputs and generate a signal that way, like a microphone, though the result is usually screeching uncontrollable feedback. I decided to "pot" the entire first set in epoxy (instead of wax) to make them strong enough to remove from the bobbins and handle as I experimented with both magnet placement and housing for the coils. There is a danger with epoxy that if I break the lead wires off it will be impossible to fix. I've lost several coils this way already. With wax, I could melt the wax out of the coil and unwind a turn of wire, but wax might not be strong enough to maintain the shape and protect the hair-thin wire during all this handling, which is why I used epoxy on these prototypes. Once I know what the final design or designs are, I can possibly use plastic or metal bobbins that are a permanent part of the structure of the pickup, and not have to take chances removing the coil from the bobbin. This is more usual commercial practice I believe. I've already had problems getting the epoxy to penetrate the coil fully, it might have just been too cold, so I had to finish the potting on the first set after I removed the coils from the bobbin, thinning the epoxy a lot with epoxy so it saturated the coil fully. I probably should have tried this from the beginning. I had problems with breaking wires when pulling the bobbins apart because the epoxy glued loose strands to the bobbin. Luckily, after the first coil, I had started putting wax on the bobbins as a mold release layer and that did help. I also started putting thickened epoxy in the bobbin before starting the coil, forming a solid inner core for the coil.
Winding The First Coils:
Pickup Video 4: Web Journal Version
Pickup Video 4: YouTube Version
 I first made a 4600K (winds) 18 inch coil to try out the machine and the whole process, from start (would the machine work at all?) to removing the coil from the bobbin and see what happens. This didn't work so well, as I snapped several wires in the process. And I found the epoxy had only penetrated halfway through the coil before it hardened, even though I sealed the ends with tape and poured in epoxy and let it stand and soak in. Maybe it was just too cold and viscous when I applied it. I could try apply successive coats of epoxy as I wind the wire, though I had images of spraying epoxy across the room when I turned on the motor.
For the next step I made six seperate bobbins. A set of two 18 inch and two 9 inch coil bobbins as a "full set" to match every place I thought I would have to place a coil to sense every string. One 18 bobbin designed to make a coil that would fit around the center bridge and sense the strings on both sides at once. The final 18 inch bobbin was for the 1K to 10k step coil described below. I tried coating that bobbin with a layer of thickened epoxy before winding, as well as afterwards, which worked well. After the experience with the first coil I tried painting the bobbins with hot parafin wax before winding to help the coil come free, which worked as well. After I removed the coils I was able to use finish saturating the coils with epoxy thinned with alcohol. I still lost both 9 inch coil in the process, one in removing coils, another in rigging the coils for use. This is the nature of experiment, but I am moving forward the only way I know how.
Number of winds:
"The Step Coil"
Pickup Video 8: Web Journal Version
Pickup Video 8: YouTube Version
Coil Pickup Experiments: The Step Coil
The detailed story and results of my tests with the step coil
 Though I did a lot of research, I never found a way to decide how many winds to use, specifically, how making such long coils, using so much more wire than a standard guitar pickup, might change how many winds I should use compared to the specs for guitar pickups. Should I try to match the number of winds, or the impedance? It takes 3 feet of wire to make a single rotation on a 18 inch coil, at 5000 winds there will be about 3 miles of wire on the coil. Finally, I decided to wind the first set of coils at a guestimate of 6.5K, since I have no idea what will actually work, but that is a general average value of standard guitar pickups. These will be used to compare the sounds of different magnet types and configuration, as well as placement on the dulcimer. To address the question of how many winds to use, I built a special experimental coil. I have wound a special 1K to 10K "step-coil" where I stopped the machine every 1000 winds and pulled out a loop, labeled and taped it to the outside of the bobbin. With this coil I can connect the loops to a connector strip, and connect the output to each step one t a time and listen to the change in tone as I move from 1K to 10K on a full sized 18 inch coil. At some point there should be a relative "sweet spot", though it will actually be a range that produces a range of acceptable tone. I can use the same coil to experiment with an "active" pickup (one with power fed into it) in the 1K to 5K range. Finally I can use the single coil to experiment with dual coil setups from dual 1K up to dual 5K coils, both as humbucker phased coil and as a switched coil, where one coil can be either two coils in parallel or a single coil at twice the winds, in or out of phase. I'm hoping that thoughboth coils will be parts of the one coil, they will be different enough in position to allow the hum to cancel without the string signal cancelling. We'll see. I may have to use matching coils to experiment with humbucking/phase-cancelling arrangements, once I have an idea how many winds to use in general. In the end, it seems better to make progress through experiment, even if I waste wire.
I didn't finish the coil till 2009, but the step coil worked, though it did sustain some damage in the building out process. Since every 1000 winds had its own in and out wires, I was able to jump over the two damaged sections and still have a 1K-8K test coil. Since the initial 6.5K coils produced a good sound, I doubted I needed to go as far as 10K. 10K makes a heavy, wide, and more expensive coil, something to avoid unless nescessary. Though it does raise the possibilities of a practical multi-wound coil. See the step coil page for the full story and results, including spectrograph tests. The tests chow pretty clearly where the best range was, generally, between 4K and 7K winds.
Magnet Placement:
Pickup Video 5: Web Journal Version
Pickup Video 5: YouTube Version
 With several coils matched in size, I can try different magnet configurations and compare sounds when they are mounted in the same place. I can build various magnet configurations, though I can't do immediate switch testing like with the windings, so I'll try recording every magnet configuration. Later I can listen to them "side by side" for comparisons and see if I can judge a significant difference between different configurations. In the end, I think I'll need multiple sets of protoype coils so I can experiment with multiple configurations simultaineously, as well as have a set to perform with and get more practical use feedback, not just a sample "sound test" recording. I have several types of magnets to try, both individually and in combination, from flexible strip ribbons to both ceramic and regular bar magnets in different shapes, and button magnets. I can also try using metal to guide the magnetic field, including adjustable screws beneath individual strings. There's a lot of possibilities, though now I am focused on a working set.
Pickup placement:
Pickup Video 6: Web Journal Version
Pickup Video 6: YouTube Version
As you know, some of the bridges have tones on both sides of the bridges, and I have additional difficults with my full size 5 octave electric because I have 5 bridges. I have to make sure that every string appears on some pickup, while no strings appear too many times on the sum of all the pickups, unless I am able to control the volume of individual pickups to end up with a balanced final output. There aren't that many options for placing pickups on the dulcimer. With the 5 octave dulcimer I also needed at least one extra 8 inch coil to sense the right side of the right bridge. The main options I have is making one set of pickups to place midway between the bridges where the strings cross and again on the left side of the middle bridge. I also wound a coil sized to slip over the center bridge so that the coil runs on both sides of the center (left bridge on a standard dulcimer) bridge, with strings both above and below it. This single pickup might work for every string on a standard dulcimer. Then I also have two shorter 9 inch pickups to use because I have two extra half (one octave) bridge sections that might not be sensed by either of the 18 inch pickups. I can try placing a 18 by the edge rail of the dulcimer, because variety of tone in different pickups on an electric guitars is created by the location of the pickup more than the nature of the pickup itself. The biggest problem to overcome is that the longest strings (crossing the right bridge) pass through the areas of both coils making one note, while the strings that cross the center/left bridge have a different note on each side of the bridge, which will be sensed only once, by the coil on that side. The problem is to keep the single note strings from being sensed twice and sounding twice as loud as the ohter strings/notes that are only sensed once.
Shielding:
The final factor is providing grounded shielding for the coils. I have a ground wire on a clip that I use to instantly tell the audio effect of grounding anything. The cables I solder to the coils are shielded, and contain a ground wire for connecting componnets of the pickup in a grounding circuit. I can use cheap aluminum foil to experiment with. For final arrangements I have copper foil to line a plastic or wooden case to both protect and shield the coil.
Audio Test
I have to use two long coils for the standard bridges, one mounted in the center below the strings that captures most of the strings, and a second to left of the center bridge to capture those strings. It had to be mounted above the strings instead of below to keep it from picking up the full-length strings below them, and making them too loud in the total mix of the coils, just like with the bridge-coil design. For my 5 octave dulcimer, I have two extra bridges. I need at least one 8 inch coil for the upper right bridge. However, it is possible to position the left-hand long coil so it picks up the strings on the lower left bridge. The problem is it means the coil is a bit in the way of playing them, since the coil is mounted above the strings. I can mount a seperate 8 inch coil below those strings, far enough to not pick up the problematic full length strings where they pass above the lower left bridge strings. Though it means having four coils instead of three for a set, it may be the only solution. The other possibility is by using narrower coils, either in the shape of the coil itself or the magnet configuration, I can keep them from interfering with the playing area so much.
The coil designed to fit over the center bridge didn't work out, though it did fit perfectly. The pickup was able to sense all the strings with one coil, the The problem was the strings below it were picked up by both sides of the coil while the strings above, on either side of the bridge, were each picked up on one side. So the notes from the lower strings were twice as loud as the notes from the strings above. Though I tried different magnet configurations to try and increase the strength of the field above the coil relatively, that wasn't enough. It is possible that I could bias the magnetic field even more and eventually reach a balanced level between the upper and lower strings, with more time to experiment than I have now.
There were four main developments in 2009.
I completed the step-coil and used it to find the optimal range for the number of winds on a pickup. Using a spectragraph, I found the fullest response in the 5K to 6K range, like a guitar, despite the extra length. There was a clear upper curve in the 4K to 7K range, but tone is also a matter of opinion, and I would have to add that the pickup "worked" through the entire test range of 1K to 8K, the it had a distictly tweaked tone below and above the optimal range. Detailed results can be found in the pickup results sages, where there is a page just for the step pickup.
I wound a new set of coils at 5500 winds on permanent aluminum bobbins, potting them in wax this time, and encasing one of them entirely in a solid case of aluminum sheetmetal.
I built a control box which I mounted to the side of the dulcimer. I gave each of the three pickups in the working set a separate on/off switch, a tone and volume control, then fed all three to a master volume control that outputed to a 1/4" jack. Eventually, I'll mount the controls in the body of the instrument, but for now, I don't know where or even how many controls there will be in the end. The outside box lets me experiemnet with this part of the electronics till I know what I want to install permanently. I used standard guitar schematics, which are easy to find on the web, or copy from the guts of an electric guitar. I won't go ino the details here, but eventually I quess I'll have to make a page just for wiring and control set-ups.


I completed a working set of coils and used them playing in Florida, subjecting them to real world conditions on the road as a working performing, from being hauled around and handled to performing in venues, at festivals, and on the street, in all conditions, day and night, sun and rain. This included having a bad accidentr and smashing one pickup, replacing it with another, and using the control box to balance the mismatched pickups, and keep on playing.
The final conclusion? They worked great. I have no doubts that wound pickups work and are practical, and they will be standard from now on.

I have working pickups, and plan to use them as I move on to the recording project. The pickups I have are fine for now, so the next priority is to make more like them so I have spares. I already lost one of the original set, smashed when the dulcimer fell, and was lucky I had a second generation pickup completed to replace it with. I have already had to wind another 8 inch coil as well, after the wires were torn off the one I was using. That will probably take me through the rest of this year. The present configuration works well, even unmatched.
I'll have to wind more coils just to have spares for replacements, but that is all for now. Perhaps next I will try some new configurations, or try more experiments with the switch coil concerning phase-cancelling and the potential for using something like the step coil as a pickup itself, able to switch to many configurations and tones. But the fact is I am just one man with way too much to do. I need to focus on the core projects, like completing this website and making the videos I've added now. I hate to stop working on pickups, but they are just part of a much bigger job, so I have to prioritize, that means recording next, and getting back to playing since that's what I do for a living. One step at a time. And I have made a major step here.

C and H Sales - surplus electronics and machinery
All Electronics - a great source of discount surplus electronics parts, switches, magnets, jacks, plugs, motors, piezo elements, cables and wire among other things.
MWS Wire - #42 plain enamel covered wire for handwinding pickups
The Magnet Source - all types of magnets
other handwinder sites:
http://designed2wind.alphalink.com.au/ - DIY high quality winding machines
http://www.cinternet.net/~rewinder/
http://www.harpamps.com/micKdiy/DIY-Coil-Winder.html
Pickup sites:
http://mywebpages.comcast.net/skgs/sk/Index.htm
http://tomacorp.com/pickups.html
http://users.chariot.net.au/~gmarts/index.html - very good general site
http://www.guitarnuts.com/index.php - good source for schematics and other information on wiring
http://europa.spaceports.com/~fishbake/fpickup/pickup.htm
http://www.harmony-central.com/Guitar/electric-construction.txt
http://www.harmony-central.com/Guitar/other.html#gui
http://www.penmachine.com/musicpages/guitartone.html
http://www.skguitar.com
http://www.ampge.com